パンダ: dataframe の各列のヒストグラムを作成します。
次の基本構文を使用して、pandas DataFrame の各列のヒストグラムを作成できます。
 import pandas as pd
import matplotlib. pyplot as plt

#define number of subplots
fig, axis = plt. subplots (1, 3)

#create histogram for each column in DataFrame
df. hist (ax=axis)
この特定の例では、 subplots()関数を使用して DataFrame に3 つの列があることを指定し、各列のヒストグラムを作成します。
次の例は、この構文を実際に使用する方法を示しています。
例: Pandas ヒストグラムの各列のヒストグラムを作成する
3 つの列を含む次の pandas DataFrame があるとします。
 import pandas as pd
import numpy as np

#make this example reproducible
n.p. random . seeds (1)

#createDataFrame
df = pd. DataFrame ({' points ': np. random . normal (loc=20, scale=2, size=300),
                   ' assists ': np. random . normal (loc=14, scale=3, size=300),
                   ' rebounds ': np. random . normal (loc=12, scale=1, size=300)})

#view head of DataFrame
print ( df.head ())

      points assists rebounds
0 23.248691 20.197350 10.927036
1 18.776487 9.586529 12.495159
2 18.943656 11.509484 11.047938
3 17.854063 11.358267 11.481854
4 21.730815 13.162707 10.538596
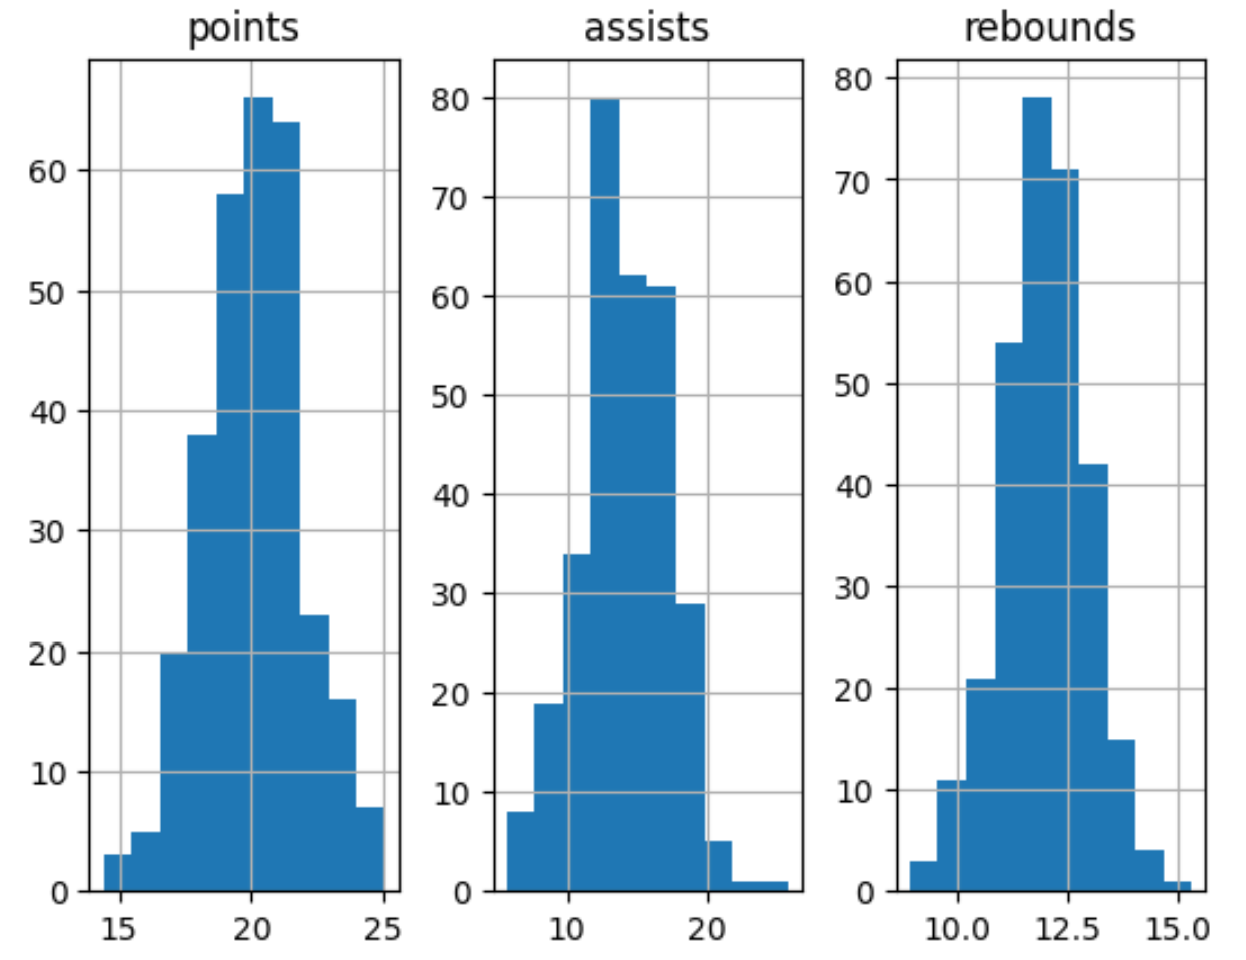
次の構文を使用して、DataFrame の 3 つの列それぞれのヒストグラムを作成できます。
 import matplotlib. pyplot as plt

#define format for subplots (1 row and 3 columns)
fig, axis = plt. subplots (1, 3)

#create histogram for each column in DataFrame
df. hist (ax=axis)

結果は、DataFrame の各列のヒストグラムを表示する 1 行 3 列のグリッドになります。
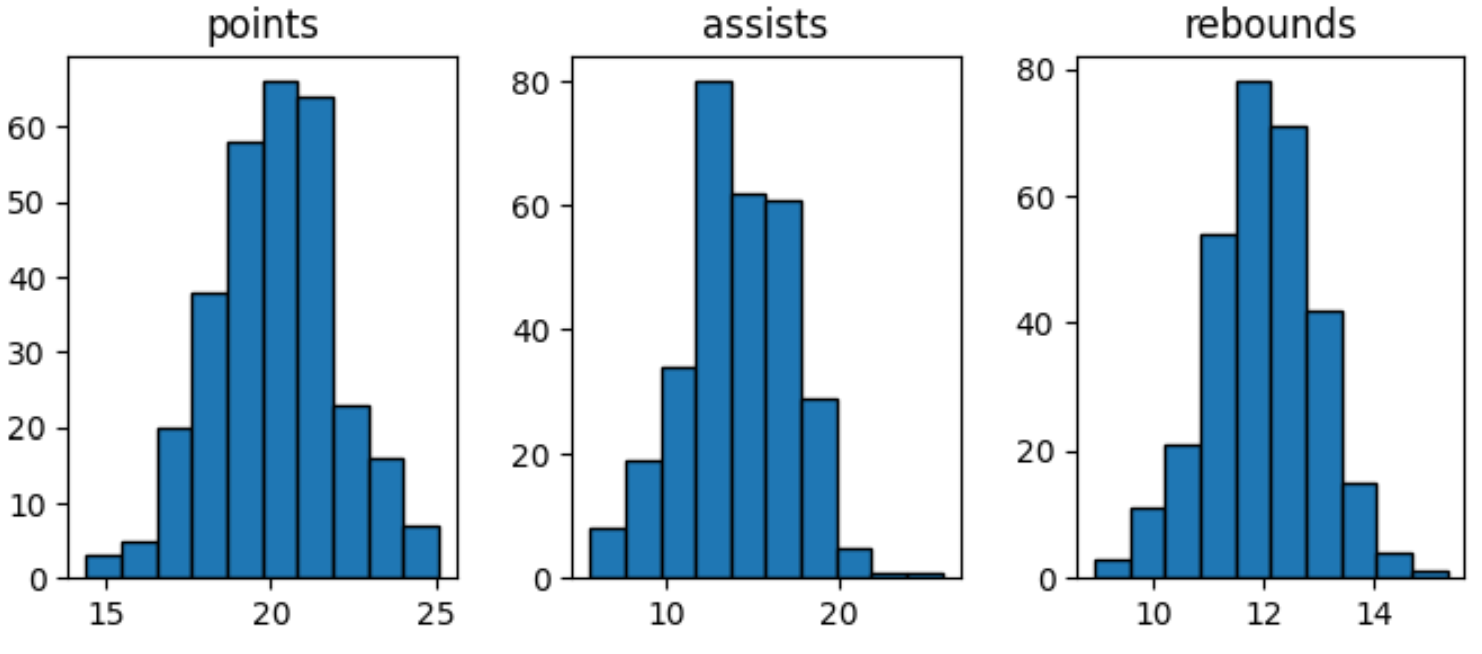
必要に応じて、 figsize引数を使用してヒストグラムのサイズを変更したり、 edgecolorおよびGrid引数を使用してヒストグラムの外観を改善したりできます。
 import matplotlib. pyplot as plt

#define format for subplots
fig, axis = plt. subplots (1, 3, figsize=(8,3))

#create histogram for each column in DataFrame
df. hist (ax=axis, edgecolor=' black ', grid= False )

subplots()関数の引数を自由に操作して、ヒストグラムの正確な形式とサイズを定義してください。
追加リソース
次のチュートリアルでは、パンダで他の一般的なタスクを実行する方法を説明します。
Pandas ヒストグラムで使用されるビンの数を変更する方法
PandasヒストグラムのX軸の範囲を変更する方法
Pandas でグループごとにヒストグラムをプロットする方法