วิธีสร้างฮิสโตแกรมจากซีรีย์ pandas
คุณสามารถใช้ไวยากรณ์พื้นฐานต่อไปนี้เพื่อสร้างฮิสโตแกรมจากชุดหมีแพนด้า:
my_series. plot (kind=' hist ')
ตัวอย่างต่อไปนี้แสดงวิธีใช้ไวยากรณ์นี้ในทางปฏิบัติ
หมายเหตุ : หากคุณใช้สมุดบันทึก Python ออนไลน์และไม่เห็นฮิสโตแกรมปรากฏขึ้นหลังจากใช้ไวยากรณ์นี้ คุณอาจต้องระบุ %matplotlib ออนไลน์ ก่อน
ตัวอย่างที่ 1: สร้างฮิสโตแกรมความถี่
รหัสต่อไปนี้แสดงวิธีการสร้างฮิสโตแกรมความถี่จากชุดหมีแพนด้า:
 import pandas as pd

#createSeries
data = pd. Series ([2, 2, 2, 3, 3, 4, 5, 7, 8, 9, 12, 12, 14, 15, 16, 16, 18,
                    19, 22, 22, 22, 25, 26, 27, 30, 33, 33, 33, 34, 35])

#create histogram from Series
data. plot (kind=' hist ')
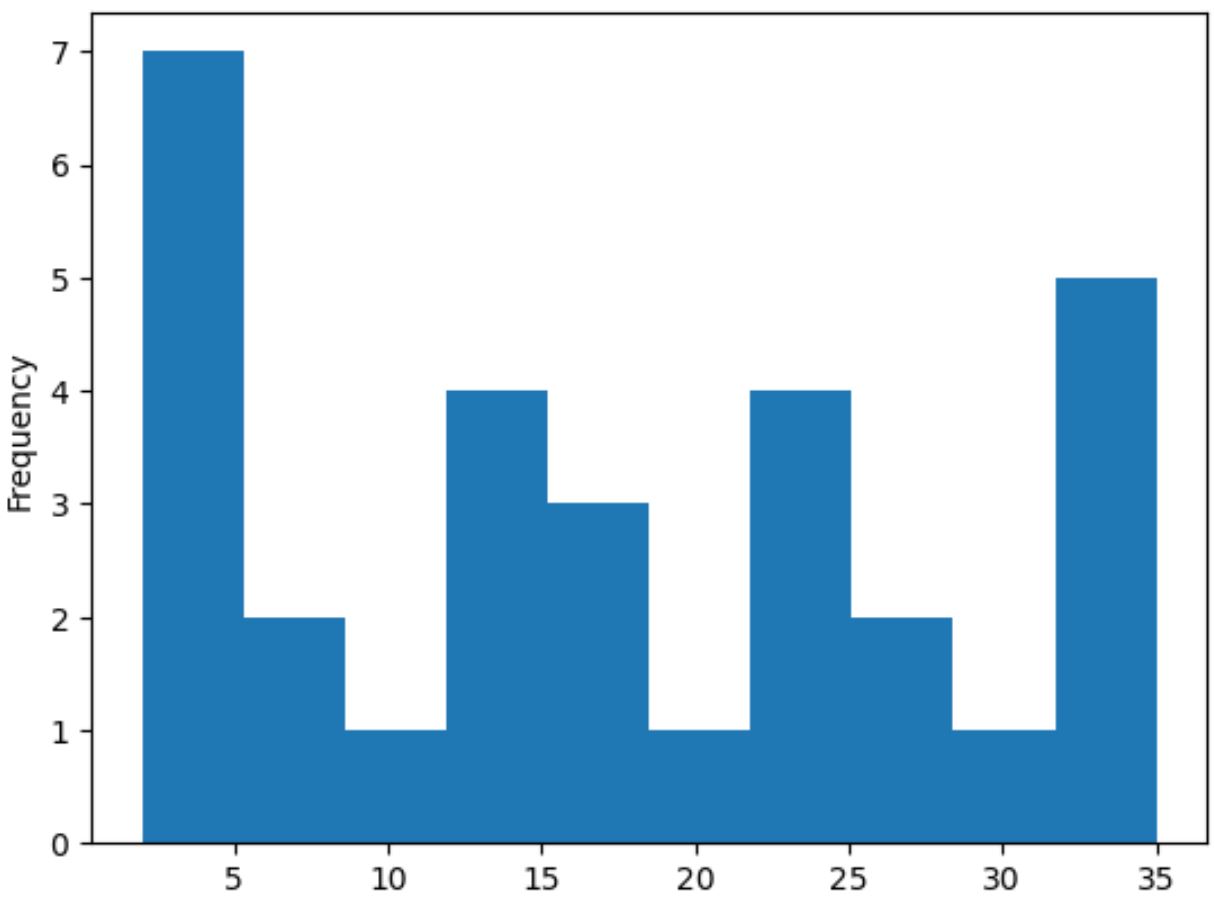
แกน x จะแสดงค่าของชุดแพนด้า ในขณะที่แกน y จะแสดงความถี่ของแต่ละค่า
ตัวอย่างที่ 2: สร้างฮิสโตแกรมความหนาแน่น
หากต้องการสร้างฮิสโตแกรมความหนาแน่นจากชุดหมีแพนด้า เราสามารถระบุ Density=True ในฟังก์ชัน plot() ได้:
 import pandas as pd

#createSeries
data = pd. Series ([2, 2, 2, 3, 3, 4, 5, 7, 8, 9, 12, 12, 14, 15, 16, 16, 18,
                    19, 22, 22, 22, 25, 26, 27, 30, 33, 33, 33, 34, 35])

#create histogram from Series
data. plot (kind=' hist ', density= True )
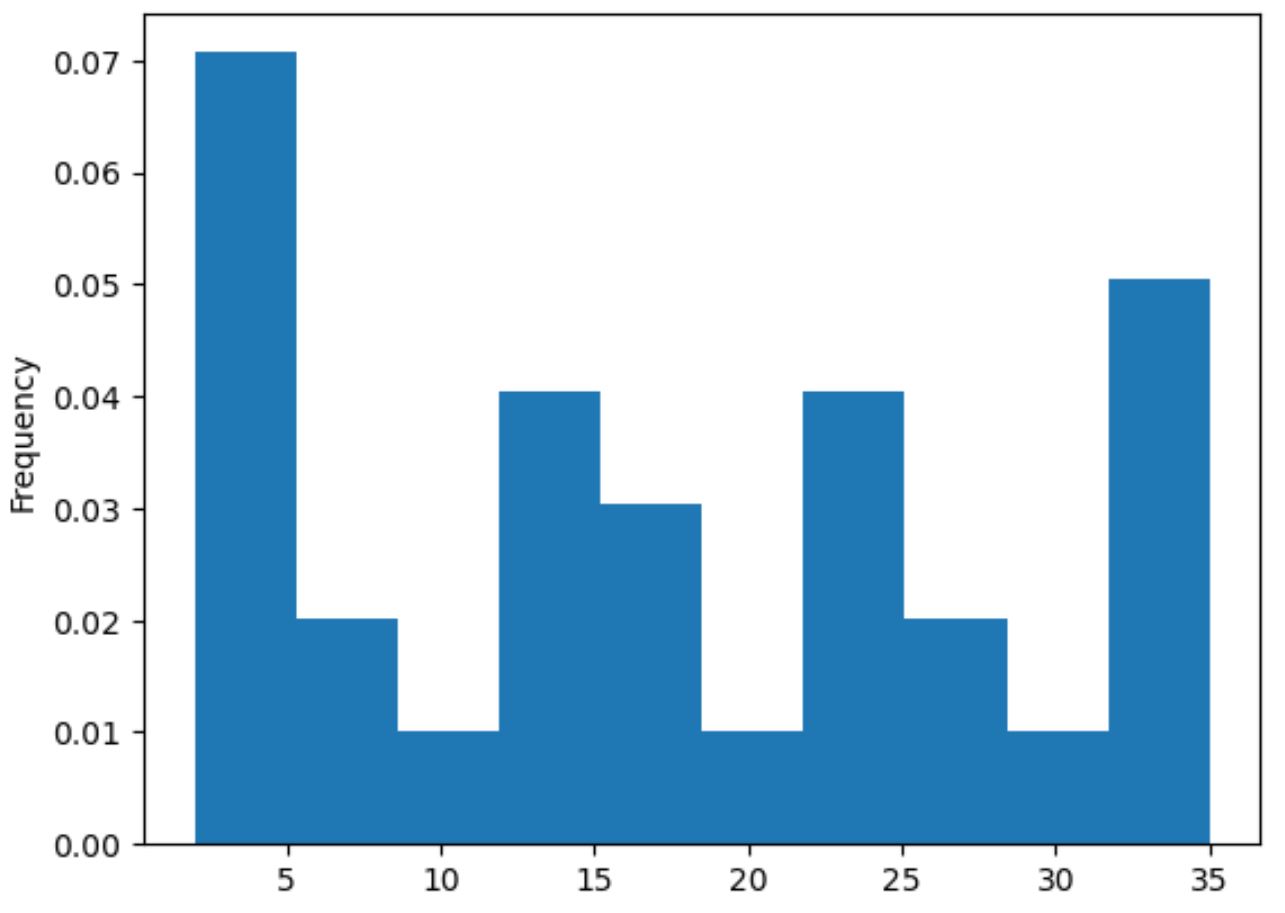
แกน x จะแสดงค่าชุดแพนด้า ในขณะที่แกน y แสดงความหนาแน่น
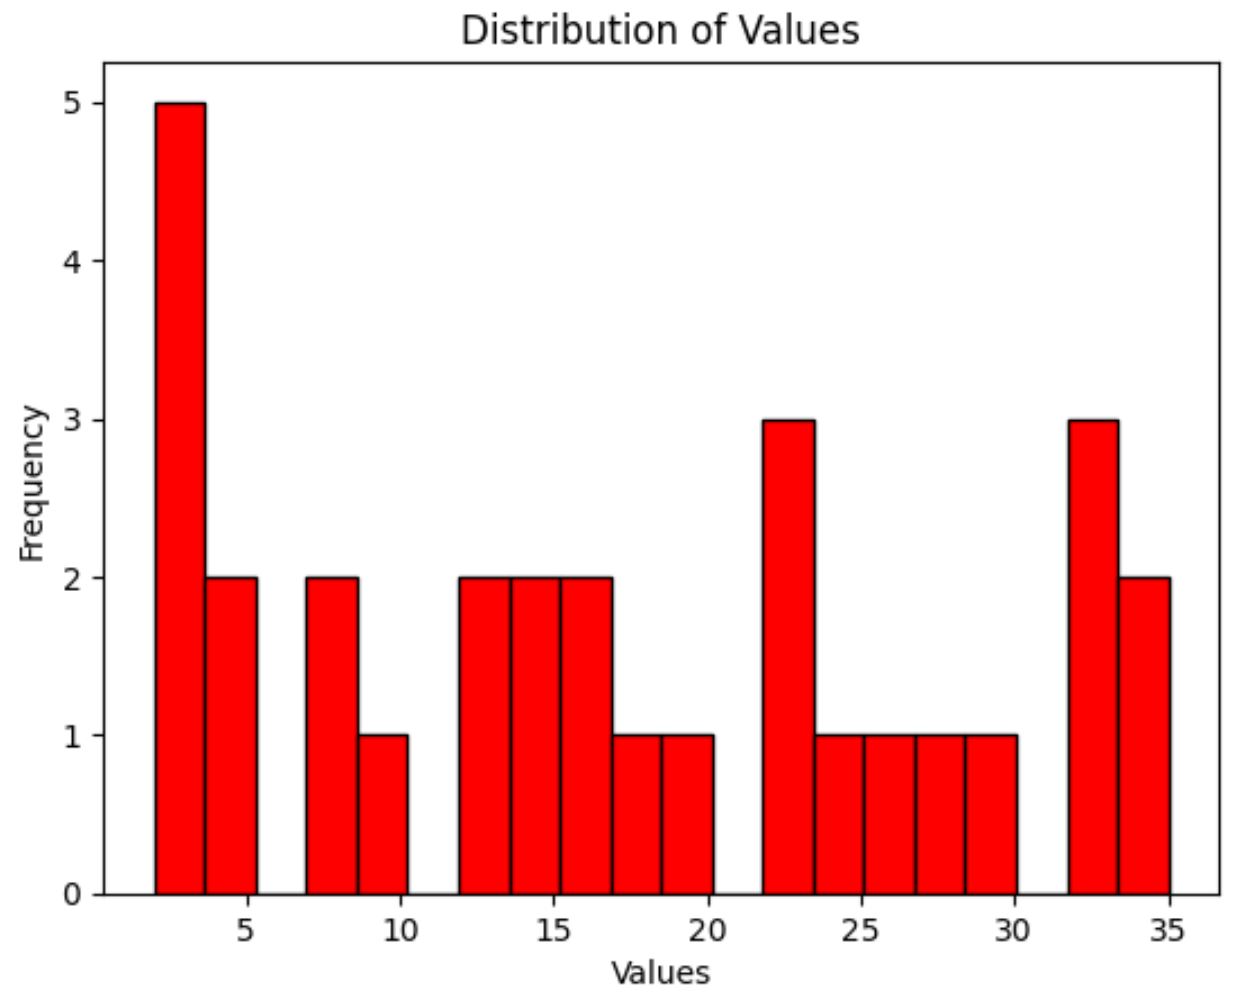
ตัวอย่างที่ 3: สร้างฮิสโตแกรมที่กำหนดเอง
สุดท้ายนี้ เราสามารถใช้ไวยากรณ์ต่อไปนี้เพื่อปรับแต่งสีของแถบฮิสโตแกรม จำนวนถังขยะที่ใช้ ป้ายกำกับแกน และชื่อโครงเรื่อง:
 import pandas as pd

#createSeries
data = pd. Series ([2, 2, 2, 3, 3, 4, 5, 7, 8, 9, 12, 12, 14, 15, 16, 16, 18,
                    19, 22, 22, 22, 25, 26, 27, 30, 33, 33, 33, 34, 35])

#create histogram with custom color, edgecolor, and number of bins
my_hist = data. plot (kind=' hist ', color=' red ', edgecolor=' black ', bins= 20 )

#add x-axis label
my_hist. set_xlabel (' Values ')

#add title
my_hist. set_title (' Distribution of Values ')
แหล่งข้อมูลเพิ่มเติม
บทช่วยสอนต่อไปนี้จะอธิบายวิธีสร้างแปลงทั่วไปอื่น ๆ ใน Python:
วิธีพล็อตหลายบรรทัดใน Matplotlib
วิธีสร้าง boxplot จาก Pandas DataFrame
วิธีลงจุดคอลัมน์ Pandas หลายคอลัมน์บนแผนภูมิแท่ง
เกี่ยวกับผู้แต่ง
ดร.เบนจามิน แอนเดอร์สัน
สวัสดี ฉันชื่อเบนจามิน ศาสตราจารย์สถิติเกษียณอายุแล้ว และผันตัวมาเป็นครูสอนสถิติโดยเฉพาะ ด้วยประสบการณ์และความเชี่ยวชาญที่กว้างขวางในสาขาสถิติ ฉันกระตือรือร้นที่จะแบ่งปันความรู้ของฉันเพื่อเสริมศักยภาพนักเรียนผ่าน Statorials. รู้เพิ่มเติม